The Peer Map view
To display the Peer Map:
1. Open a capture window and begin capturing traffic.
2. From the capture window, click the Peer Map view. Node pairs begin to populate the Peer Map view, with conversations indicated by connecting lines.
TIP: Hold the cursor over a particular node in the Peer Map to see a tooltip with more information about this node. You can also hover over a conversation line to get a tooltip with information about that conversation.
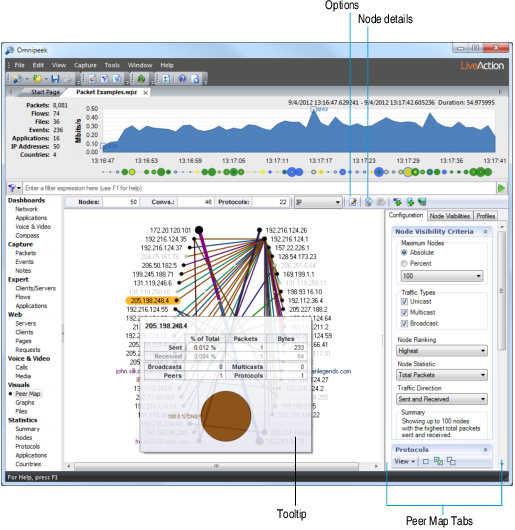
3. Click to open the Peer Map Options dialog. This dialog lets you choose to show or hide displayable node type icons (server, workstations, etc.), node visibilities, and protocol line segment gaps.
4. Click to view statistics about this node.
5. Use the tabs in the right pane to configure Peer Map settings:
• Configuration: This tab lets you set the basic parameters of the Peer Map, what part of the traffic in the capture window’s buffer is displayed, and how the protocols (line segments) are displayed in the Peer Map.
• Node Visibilities: This tab displays node counts and nodes that are both shown and hidden in the Peer Map.
• Profiles: This tab lets you configure settings into a profile that controls the appearance and layout of the Peer Map.
6. Right-click on a node for other options, including:
• Arrange: If you have changed the appearance of the Peer Map by dragging nodes to new positions, this option arranges the node back to the ellipse of the Peer Map.
• Node Details: This option opens the Detail Statistics window and shows details of the selected node.